Golden Web Inventory system


|
|
Golden Web Inventory system |
|
|
Manufacture, Work Order |
Conents Top Previous Next |
|
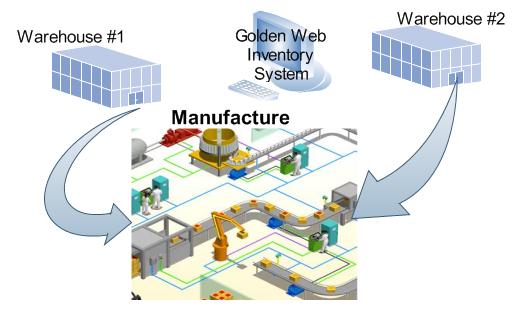
Golden Web Inventory System uses Work Orders for tracking manufacture and creating of assemblies and kits.
Click the Work Order button in the left toolbar . You enter a new assembly product created in your company, components, date , quantity used on the Work Order form . You can create the new work order from a previous saved Component list (or Bill of Materials). You will be prompted if the product isn't enough in your warehouse. Click the Save button and print the Work Order. GWIS will decrease on hand amount of components entered in the Work Order and increase amount of assembly product. All your staff know available product- for-sale inventory at all times.
To call the form for creation of a new work order click the button Create new: Work Order on the main menu or the button New on the Work Order list form.
Fields:
Number In the field Number you must enter the Work Order number. This field is a alphanumeric field. You can enter letters and numbers. The system will automatically increment the number each time you create a new order or you will enter them manually. Each Invoice has an unique number and the system will not allow to enter two identical numbers. Date You must select a date from the calendar which will appear after click on the field Date. Assembly product You should select an Inventory assembly from drop down list or enter a new name of product manually. Quantity You enter here quantity of the Assembly product. Price You write here a price of the Assembly product Serial # If necessary, you can reference serial number of the Assembly product in this field. Customer:Job If you create the assembly for a customer job select it from drop down list. Reference You can enter here any additional information concerning this invoice. Order Items Click the button "Product" and select a component from product list. You can simply type Product Code in the column Item and press Enter. If this product code exists, system will automatically fill out the fields "Description" and "Unit Price" . If this product code doesn't exist, you must enter description, unit price, quantity, tax and after clicking "Save" button system add this product in the Product List.Besides, you can use any bar code reader that is translated and entered directly into the keyboard buffer as regular text.You'll see the warning message if you enter in the work order a product with zero or small on hand quantity in the warehouse.You have a possibility to find any product in the big order using the button "Find". You can delete an unnecessary item if establish on it the pointer and click the button "Delete".
Comment The field Comment allows you to enter any Invoice comments.
Reference Here you can do a note about condition of this Invoice.
Group The field"Group" is used for classification of the Work Order . You can sort and apply a filter by "Group" in the Work Orders list and reports. Assembly Location You may indicate where you locate the Assembly product. Status You can select status of your Order : Approved ,Waiting for planned transaction and Canceled.
Item Location You can define a warehouse for the assembly's components.
Buttons:
New row,Insert Adds (or Inserts) a new row in the component table.
Products Calls the drop down Product List form .
Find You may find any product amongst already entered items.
Delete You can delete any unnecessary component if you establish the pointer on it and click the button "Delete".
Options When you click the button " Options " , you can change any caption of the Work Order. This Options form allows to adjust the screen form in any kind, appropriate for you.
Template You can run the Template Editor for editing of the Work Order printing template. You can edit the order template using your mouse and toolbar buttons. You can click the toolbar buttons "Line","Frame","Image", "Text" or "Data" and paint with the mouse different elements. You may use the right mouse button and menu items also. You must save the template after editing. You can create several templates for printing of work orders. Select the appropriate template from drop down list on the work order form before printing.
Use this button for printing the Work Order.
Save Any modifications made in the Work Order will be saved only in case if you click this button.
Close This button closes the Work Order form. If you want to save all modifications made in the form before closing the form, you have to click the button Save. If you want to leave form without saving click on this button.
|